Kichen decoration project – how to make a mosaic?
publicat in: Do it yourself // Publicata pe 05.06.2023
A charming decorative element, mosaic is easy to integrate in any modern kitchen for a special warmth. Add to this, the essential benefit: you can do it alone, thus adding a unique personal touch to your kitchen decoration project. Surely, you can also make landscaping mosaics, but this is another technology. There are three materials recommended for mosaics: stone, ceramics and glass. Of them, stone is more expensive but it is also more durable, more natural and beautiful, adding value to your decoration project.
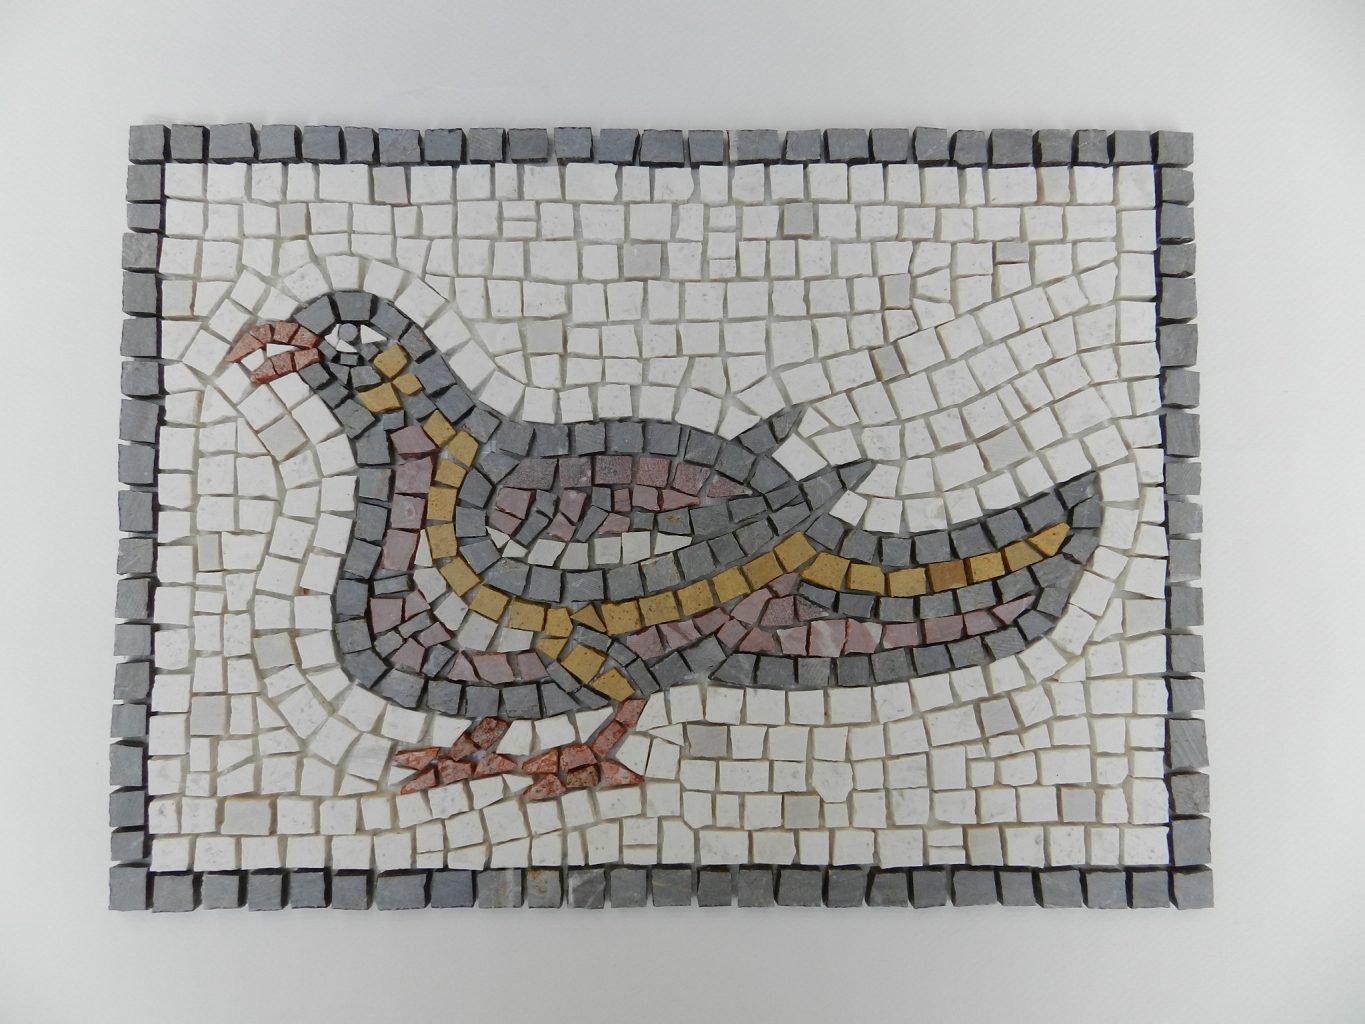
photo source: helenmilesmosaics.org
If you want to obtain a beautiful interior mosaic, follow these steps:
1. getting ready with the necessary materials – mosaic mesh, rigid MDF support plate, size depending on the model (25 x 25 cm, 40 x 40 cm), tile thickness between 10-15 mm, plastic wrap, adhesive tape, sketching paper sheet, black marker, mesh, specific pincer, tweezers, soldering solution, knife, water-soluble adhesive, medium-size sandpaper, brush, wood primer, paint, grout.
2. preparing support tile – MDF was preferred because of its adequate behavior in wet spaces. You need to prepare your surface if you want your mosaic stones to bind perfect over the surface. First, rub tile surface with medium grit size sandpaper (200 – 300). Then, prepare a 1:1 water – soluble adhesive solution, mixing thouroughly for avoiding lumps; with a brush, apply a coat of solution over the surface. Allow it to dry, then cross cut the surface with a knife. After drying, apply a coat of wood primer and a coat of paint in the end. Allow it to dry thoroughly.
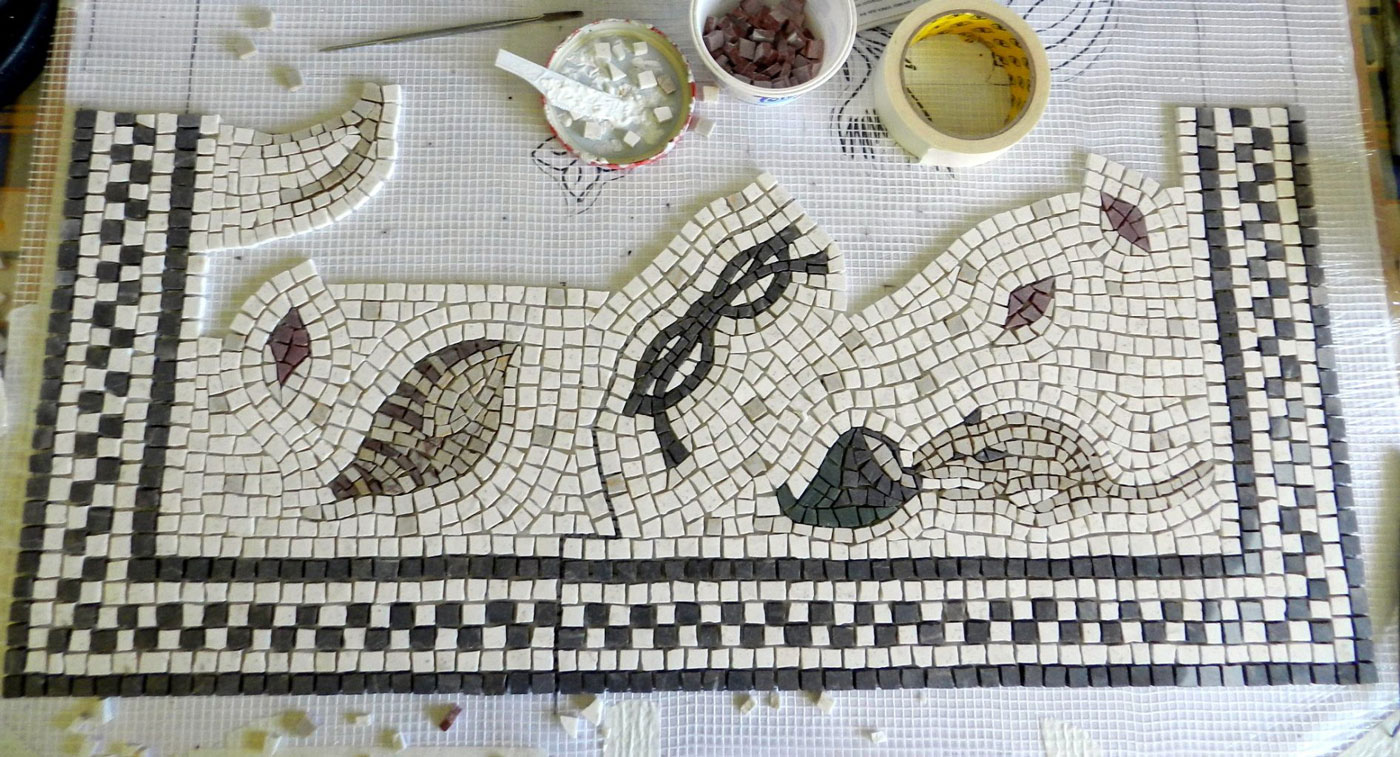
photo source: helenmilesmosaics.org
3. lay the paper sheet on the working table, stretch it well, binding the edges of support plate with adhesive tape, for preventing any movement.
4. using a marker draw your pattern
5. cover the support plate with plastic wrap, stretch it well and stick with adhesive tape on the back of the support plate. You can also use stretch wrap.
6. lay the mesh over the surface and attach the edges of support plate by gluing with adhesive tape
7. start installing the mosaic piece by piece, observing the drawing. There are two bonding techniques. First technique puts the adhesive solution in a bowl and every piece of mosaic is partially immersed in the soldering solution, then put it over the net. Second technique involves applying a coat of soldering solution, observing the drawing, then sticking each piece of mosaic on this layer. Mosaic stones must not be heavily fastened in the bracket, since placing pieces in certain areas, as shown below, needs the installed stones to be able to move.
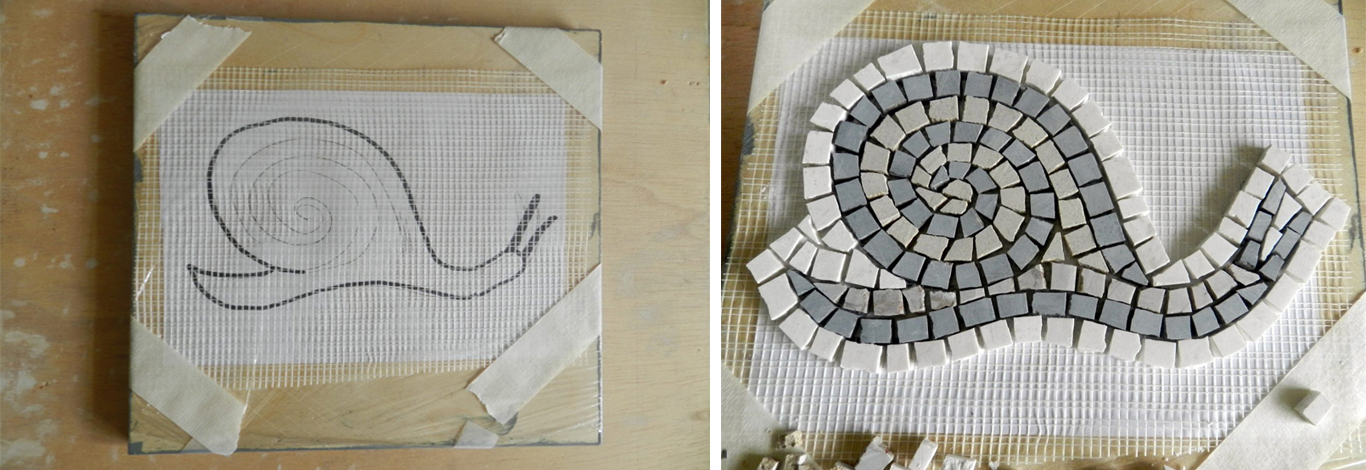
photo source: helenmilesmosaics.org
8. install pieces of mosaic in critical places (angles). For installation on these surfaces, mosaic pieces are cut with special pliers, then installed with tweezers.
9. complete the mosaic by binding pieces for creating the model. You should use stones with different color compared to those of the model, for underlining the background. If you want to avoid the painting look, skip directly to step 11. You'll get the exact pattern.
10. lay on the edge a stone row with similar color, as a painting frame.
11. allow the soldering solution to dry completely, then cut around the cladding
12. turn the backing plate and remove the foil
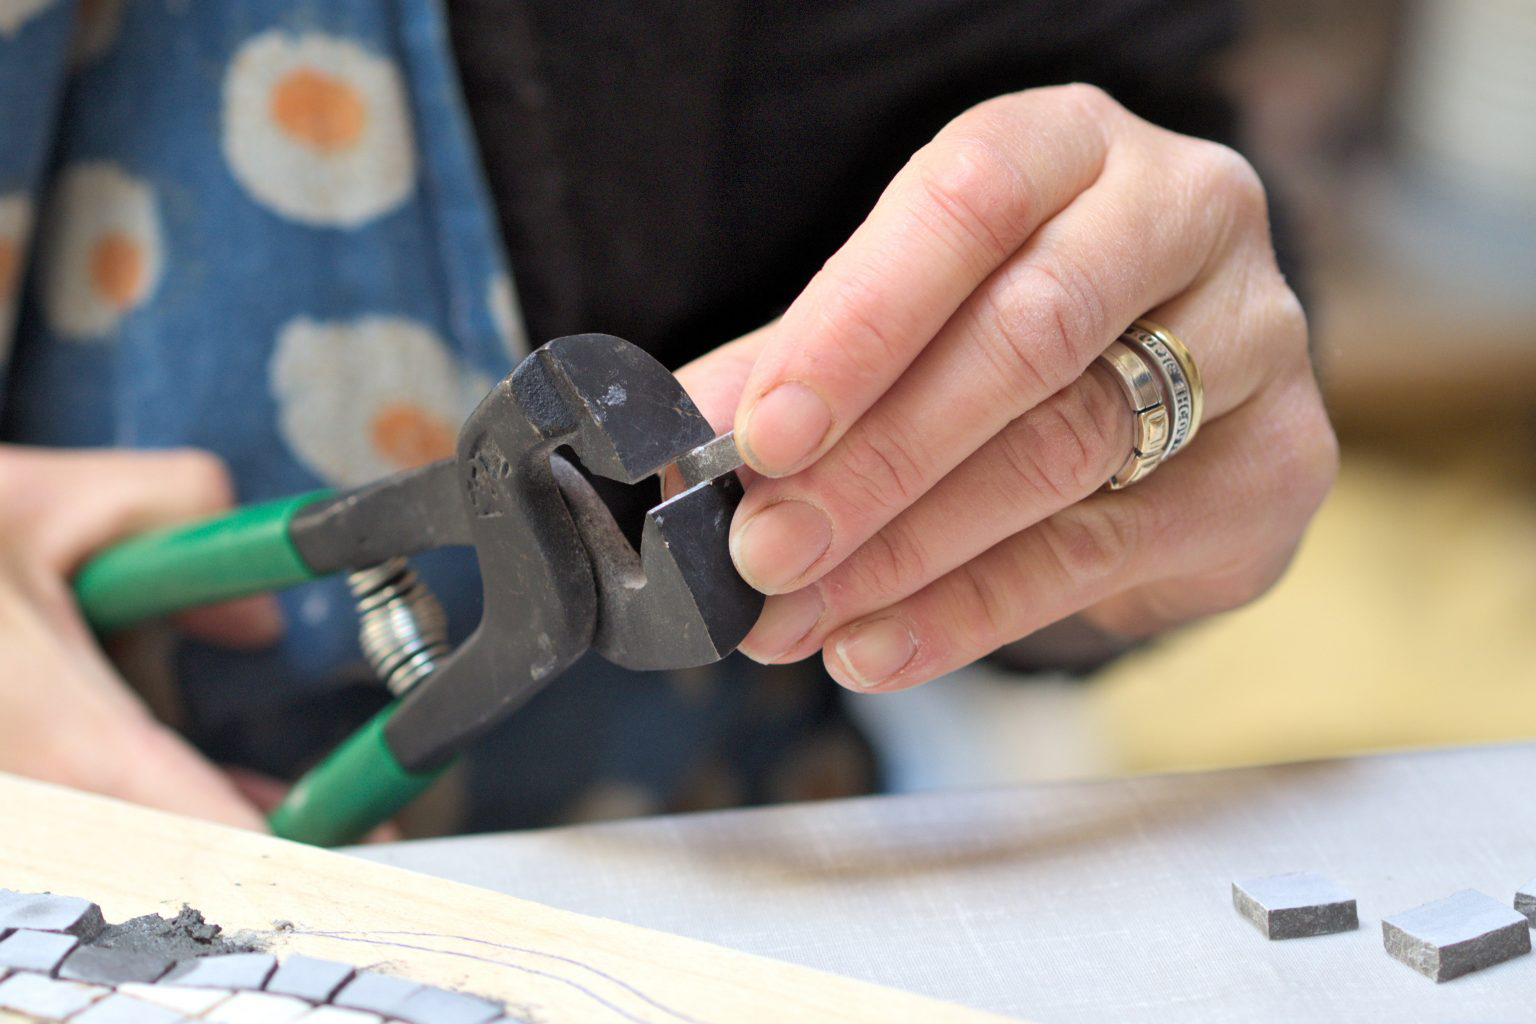
photo source: helenmilesmosaics.org
13. cladding looks like a painting that needs to be finished. The polished stone mosaic is left like it is,; the one with honed finish stone needs to be sealed with professional solutions. You can also use a color enhancer.
14. apply grout.
You have three options:
• you can use the usual stone grout. This is applied with classical technology, with a grouter, directly over surface, allow it to dry and then remove residues with a damp sponge.
• grouting self adhesive. This happens with excess adhesive, climbed on mosaic walls, assuming the grout task.
• no grouting. The mosaic pieces are glued to each other, firmly binding to the support.
Basically, making a mosaic is a creative and useful activity, producing unique elements. These are able to customize an amazing kitchen, wih a touch of style everyone needs.